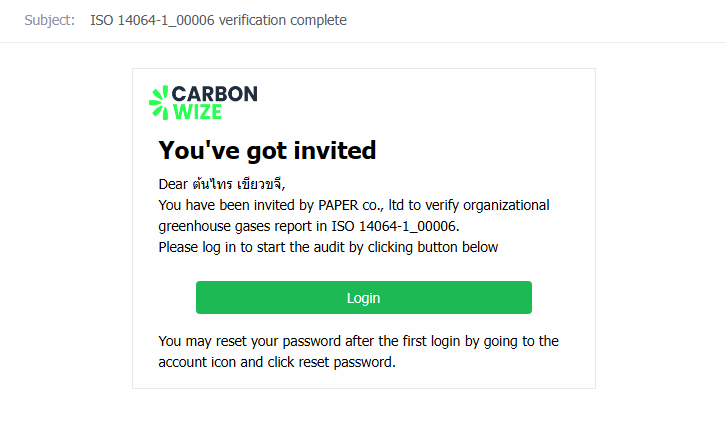
When an organization submits for verification, the auditor will receive an email notification with the subject "You've got invited" to inform them that the organization has submitted for verification. Auditors will not be able to edit the verification data.
The data verification process has the following statuses :
1. Draft - View report, edit verification settings, edit data, delete verification.
2. Waiting for the verifier - View report only.
3. In Progress - View report only.
4. Revising - View report, edit verification settings, edit data.
5. Completed - View report, view attachments only.
When an organization submits for verification, the verification status will be displayed as Waiting for the verifier.

The Data Verification page on the auditor's side displays the following verification information: Requesting Organization, Document Number, Verification Standard, Data Collection Period, Created On, Status.

Starting the Verification Process
1. Click the Start Verification button to begin the verification process. At this stage, the verification status will change from Waiting for the verifier to In Progress.


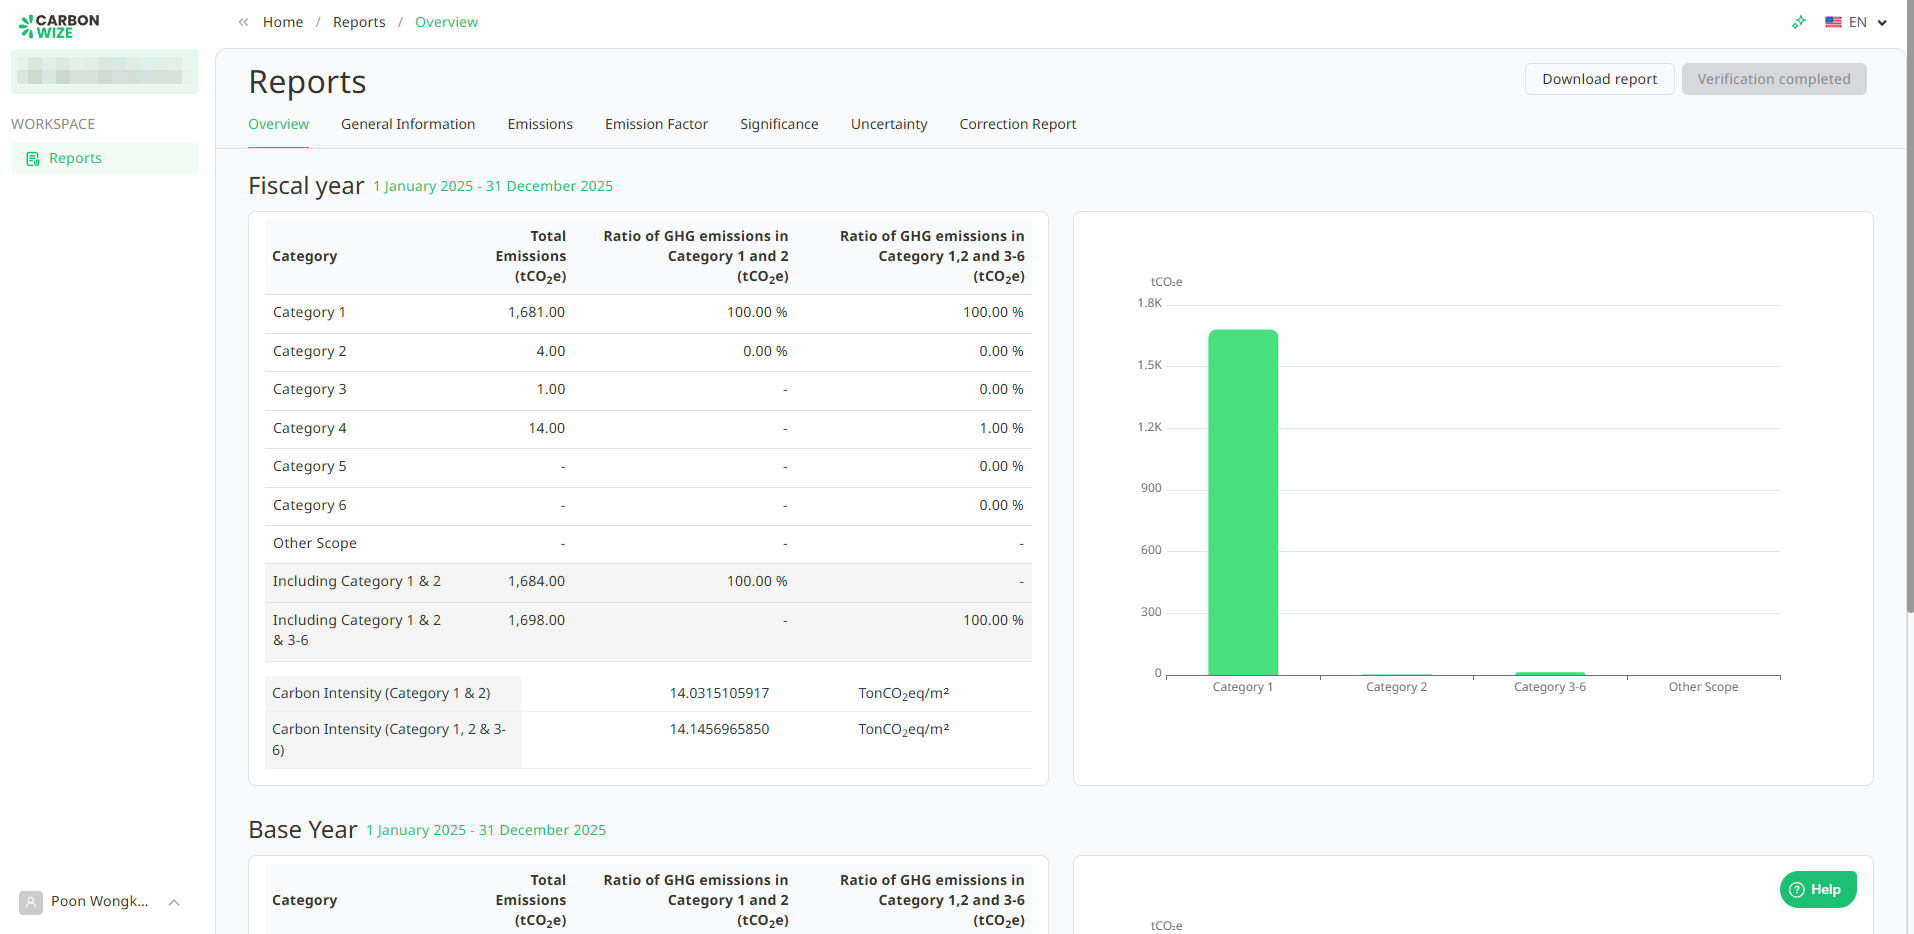
2. The report consists of the following 7 data categories :
2.1. Overview - Displays the proportion of Scope 1 compared to Scope 2 (tCO2e) and the proportion of Scope 1 compared to Scopes 2 and 3 (tCO2e).
2.2. General Information - Displays general information about the organization.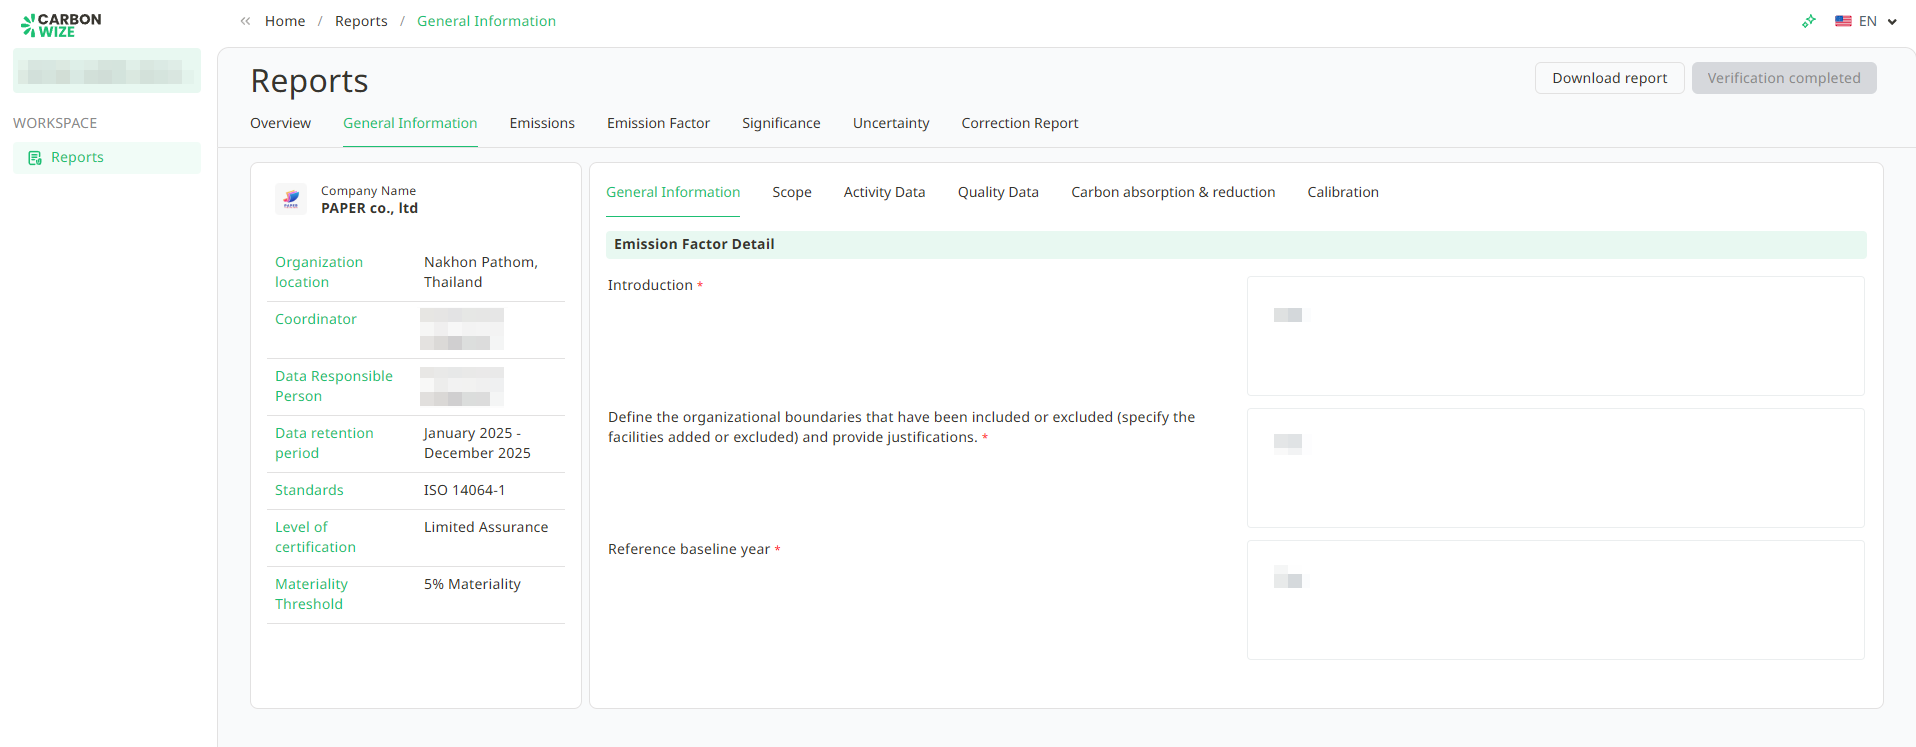
2.2.1. Scope - Displays all organizational scope information, such as organizational boundaries, organizational structure, organizational chart, and production process flow chart.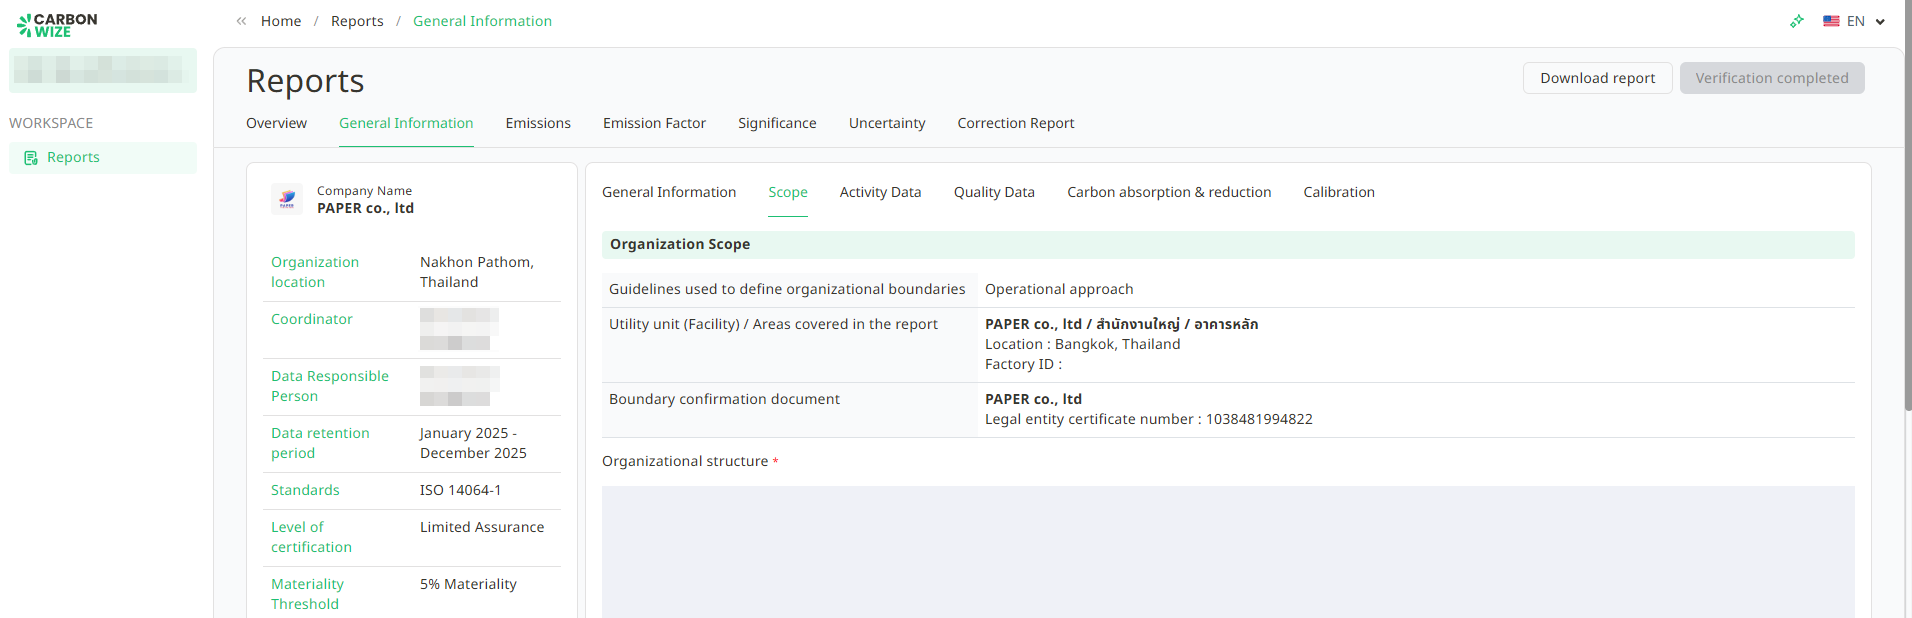
2.2.2. Activity Data - Displays a list of all organizational activities by branch and shows the scope of operations.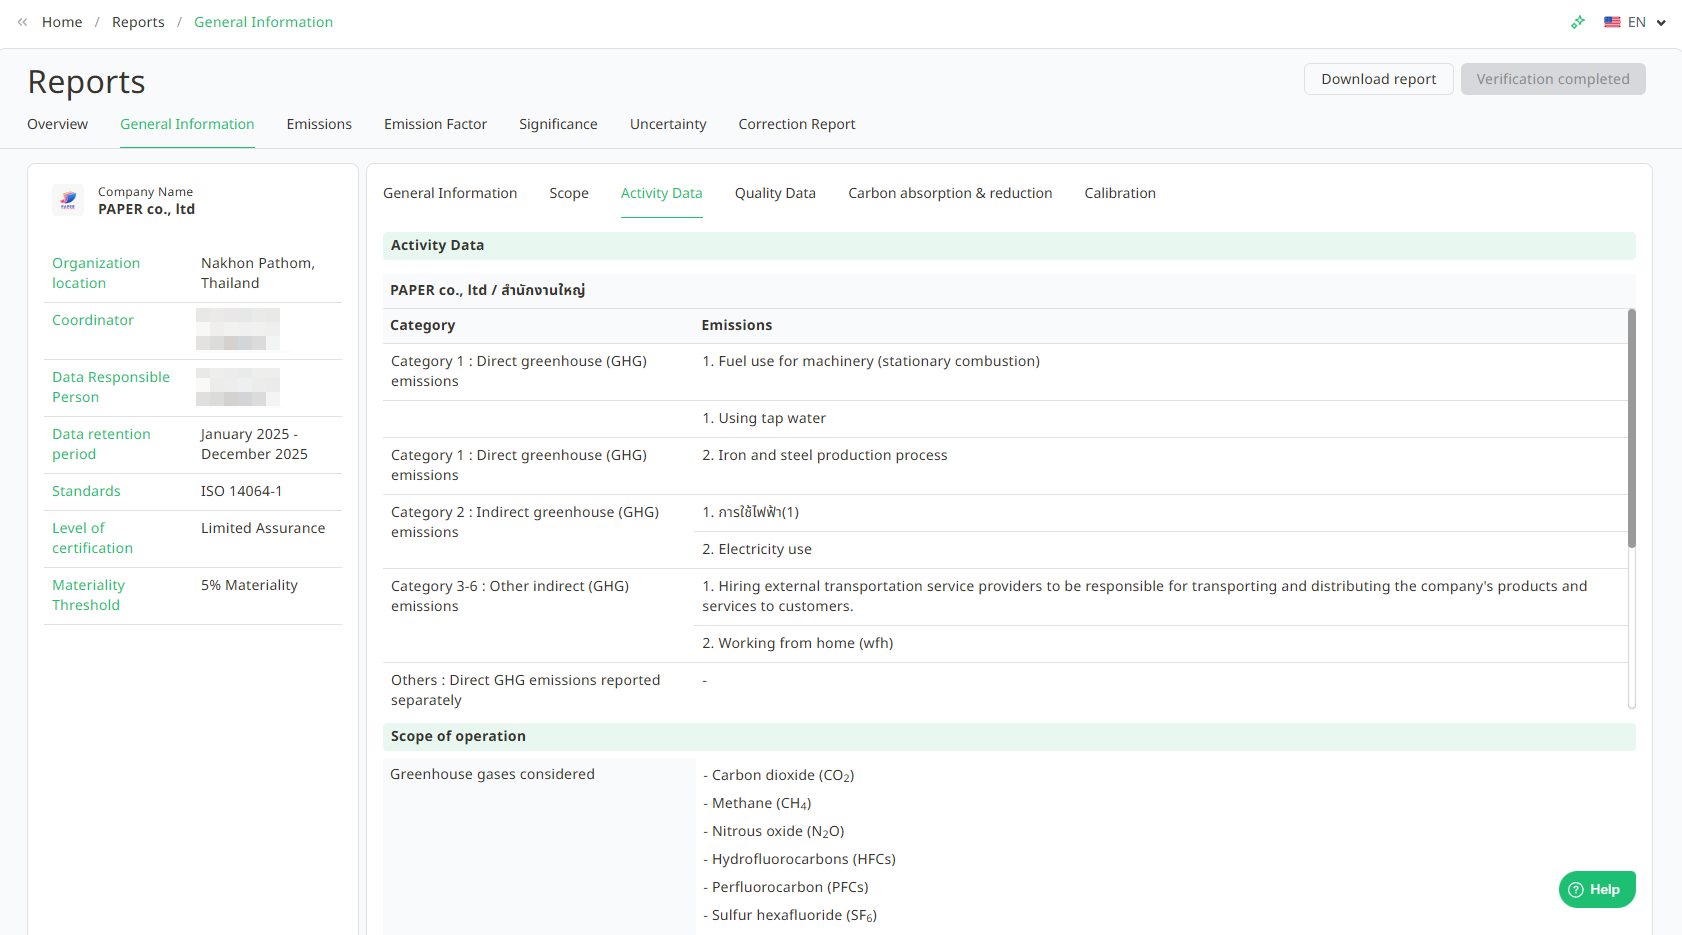
2.2.3. Quality Data - Displays the data quality management flow chart and the structure of the data quality management system.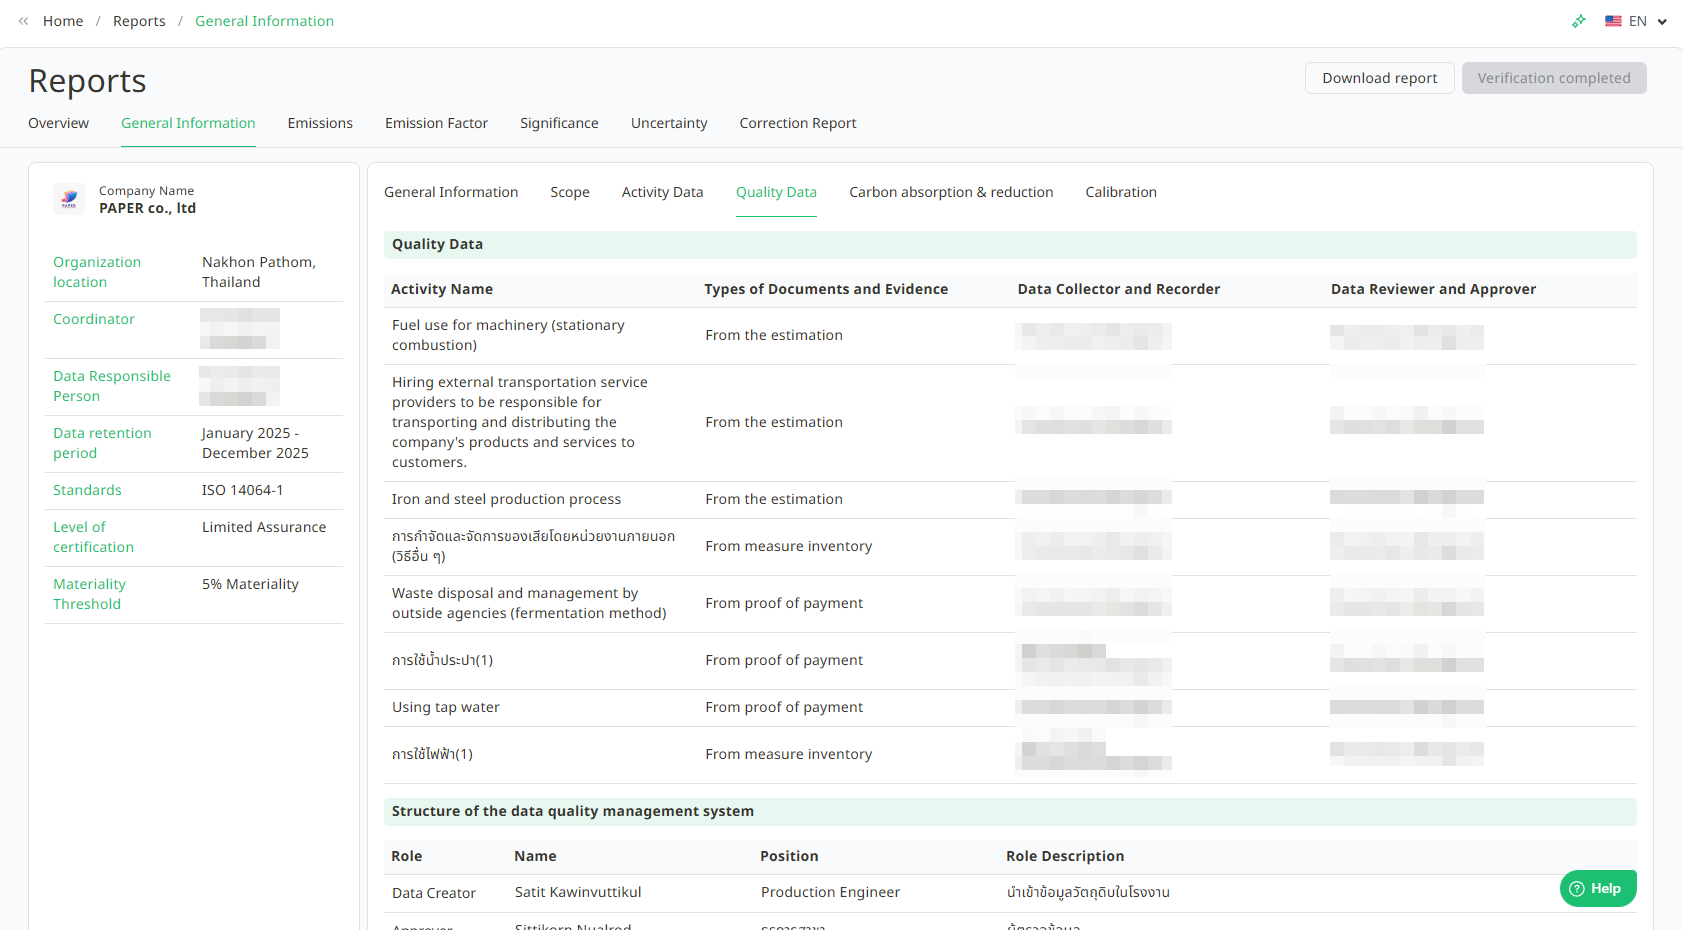
2.2.4. Carbon absorption & reduction - Displays records of carbon sequestration and greenhouse gas reduction projects/renewable energy certificate accreditation.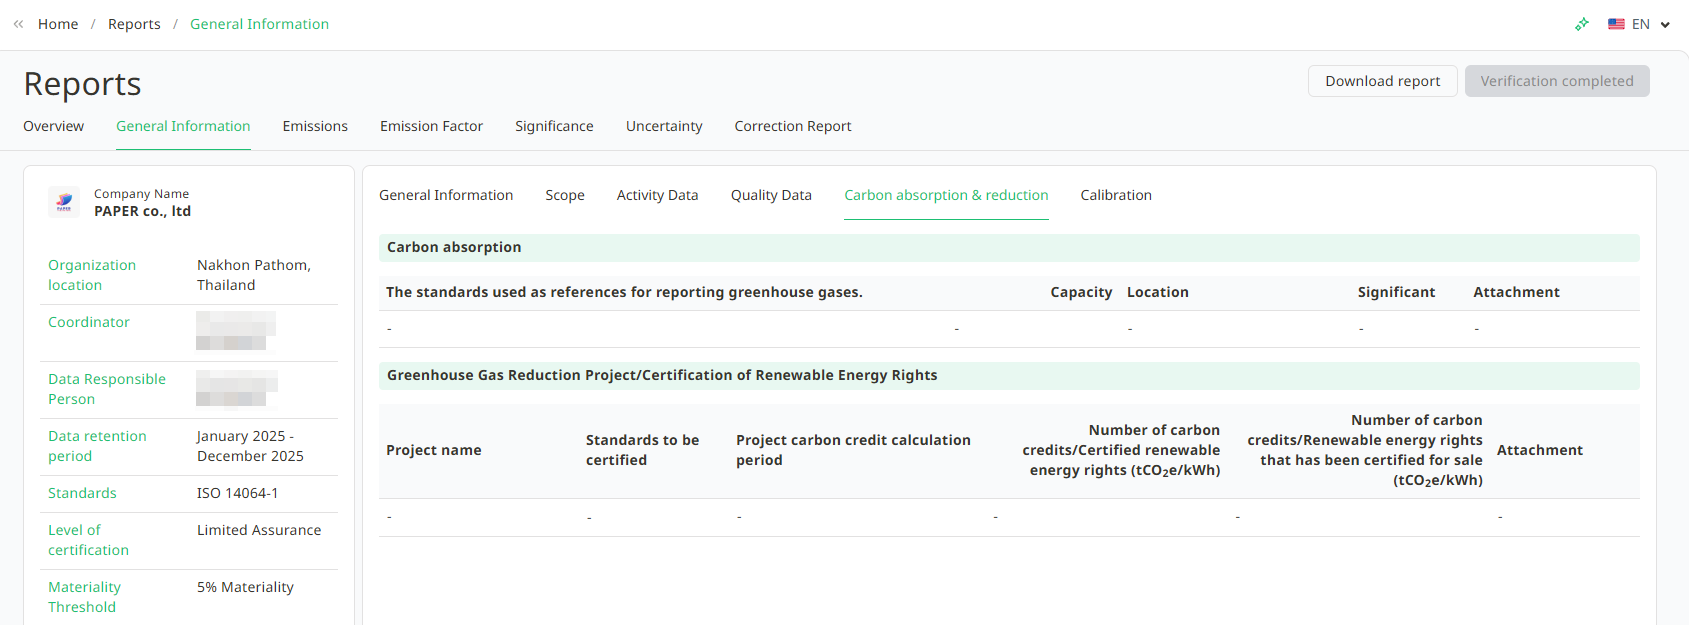
2.2.5. Calibration - Displays calibration records for standardized measuring equipment or instruments.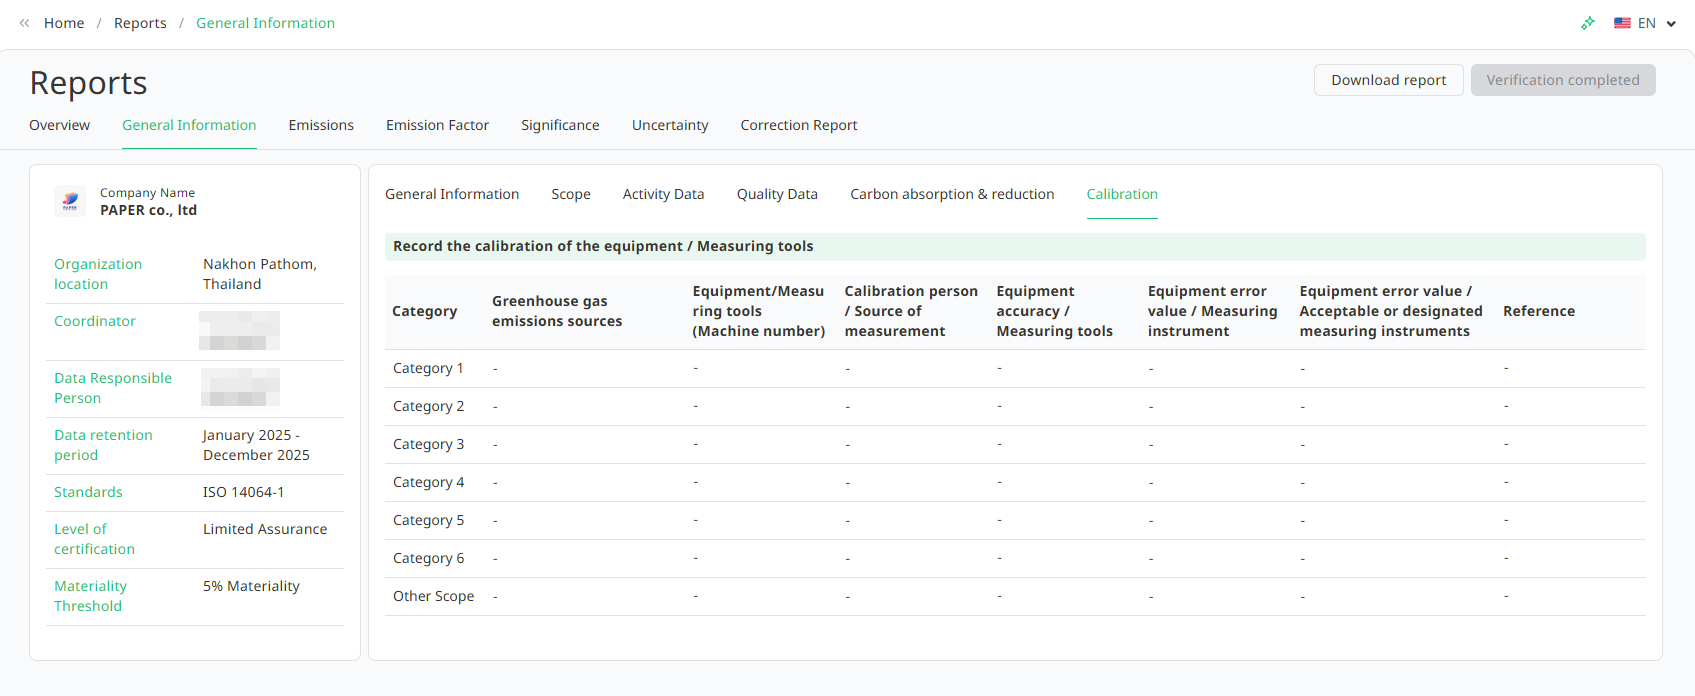
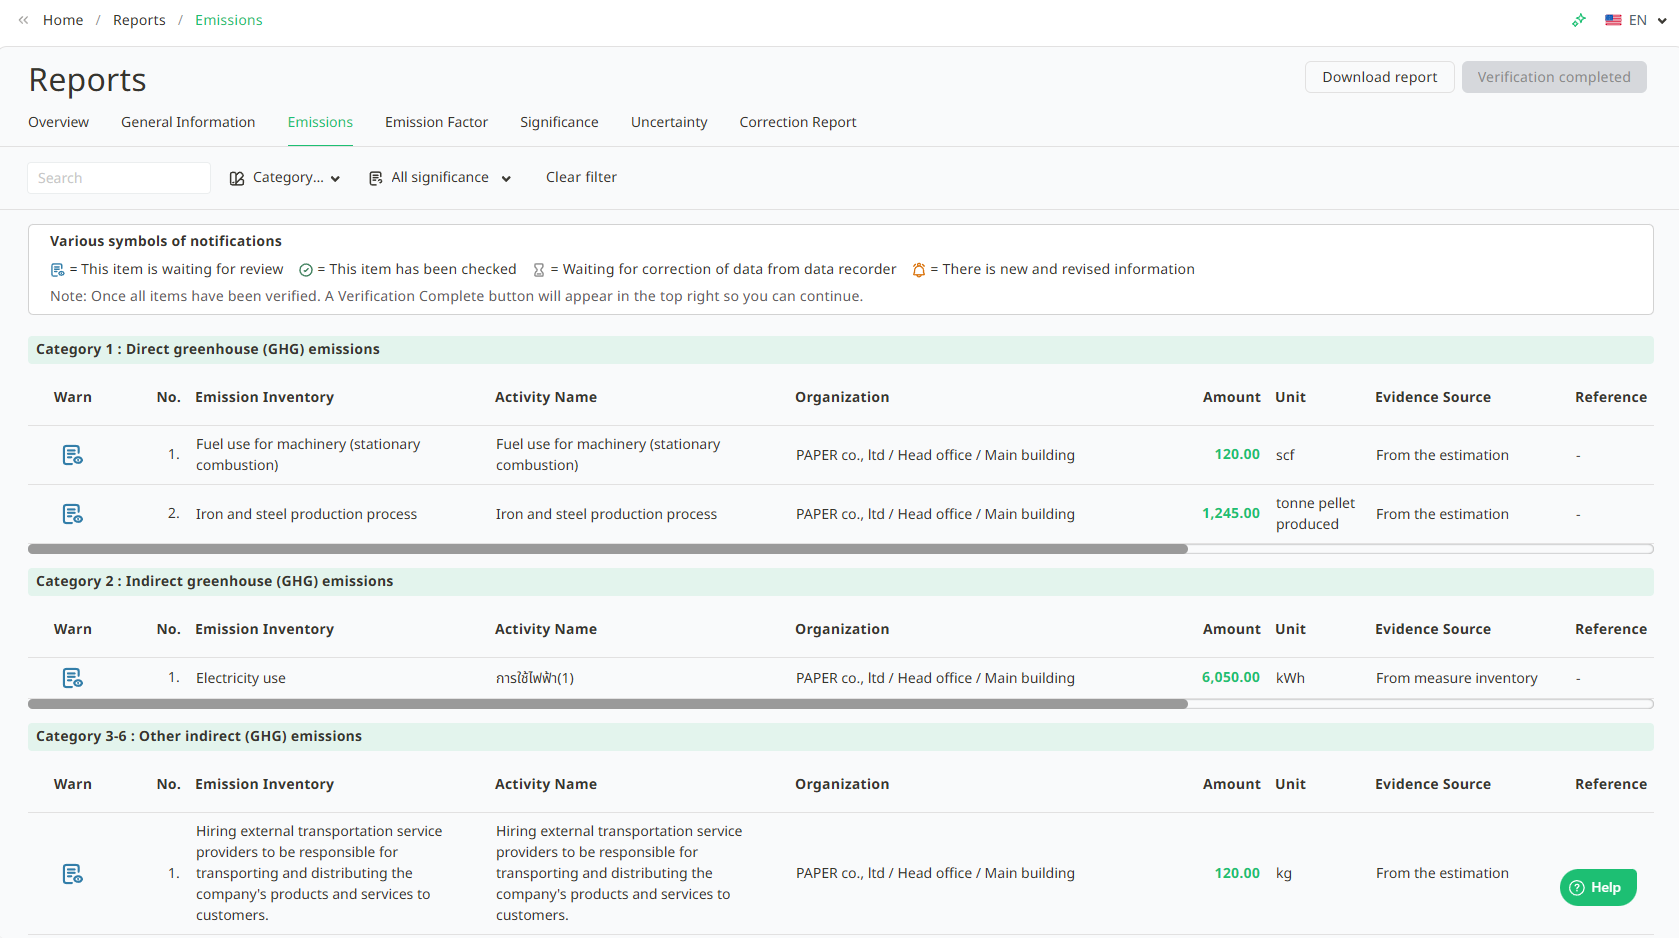
2.3. Emissions - Displays data for activity items across all greenhouse gas emission scopes. You can click on an activity item to view the monthly per-unit quantity, including attached supporting documents for that item. You can also click on an item to view further details.
When you click to view further details of an item, it will display the activity information, comparative quantity for the base year FY 2021 (tCo2eq), fiscal year FY 2021 (tCo2eq), and monthly attachments.
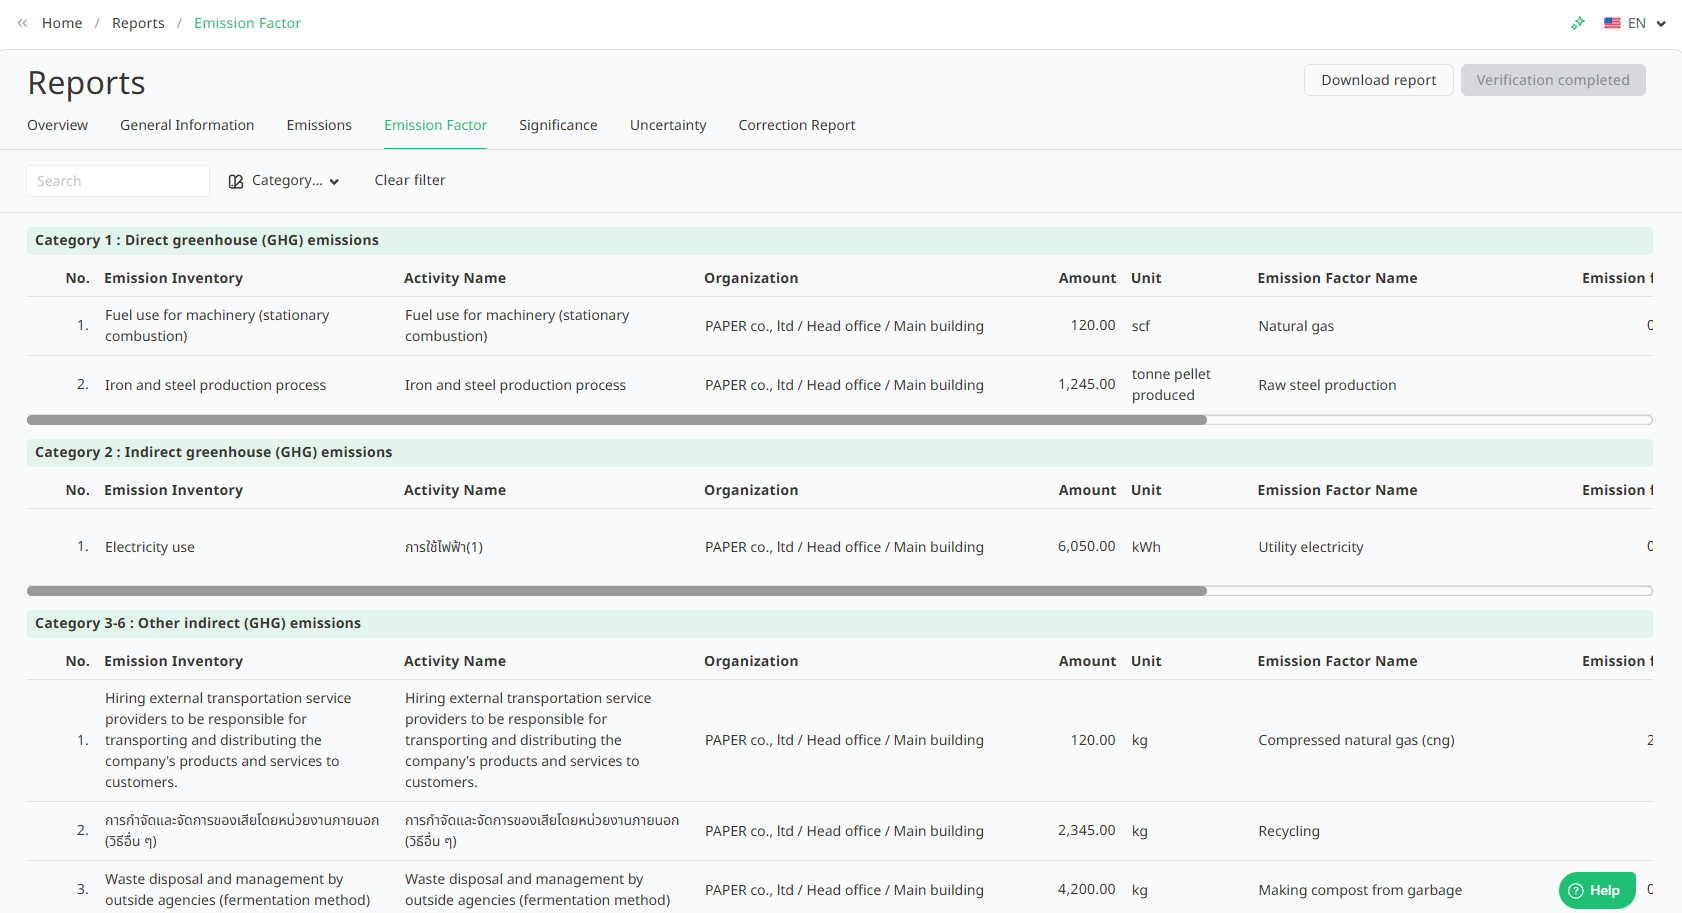
2.4. Emission Factor - Displays the calculation data for greenhouse gas emissions and the mapped Emission Factors. You can click on an item to view further details.
When you click to view further details, it will display the calculation information : Amount, Unit, Total (kg GHG/unit), Total GHG (TonCO2e).
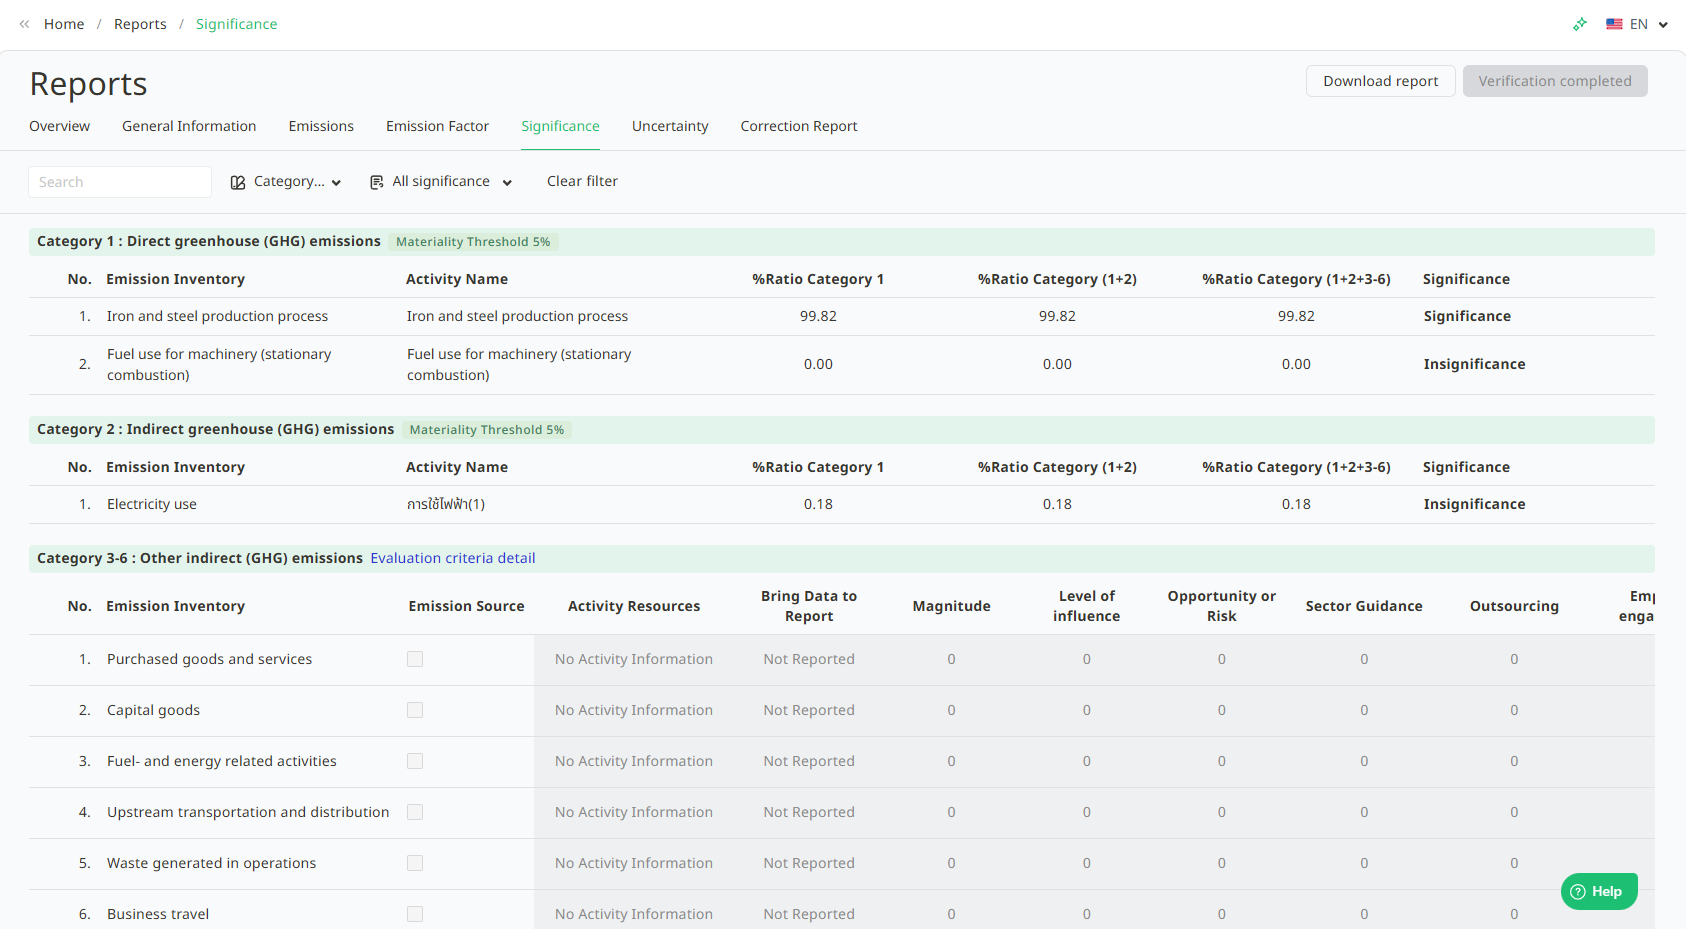
2.5. Significance - Displays the materiality assessment data for greenhouse gas emissions, separated by emission scope and the percentage used to determine data significance. It shows the percentage proportion (%) for each emission scope by activity item. The system displays numerical values representing the percentage proportion in each scope, such as Scope 1, Scope (1+2), Scope (1+2+3), etc.
The displayed numbers are used to analyze whether the percentage proportion in each scope is significant when compared to the Materiality Threshold.
Materiality Status: The system summarizes the result in the "Significant" column, indicating whether the data in that item is significant or not. For example, if the % proportion of Scope 1 or 1+2 is higher than the 5% threshold, the system will indicate "Significant"; if it is lower, it will indicate "Not Significant".
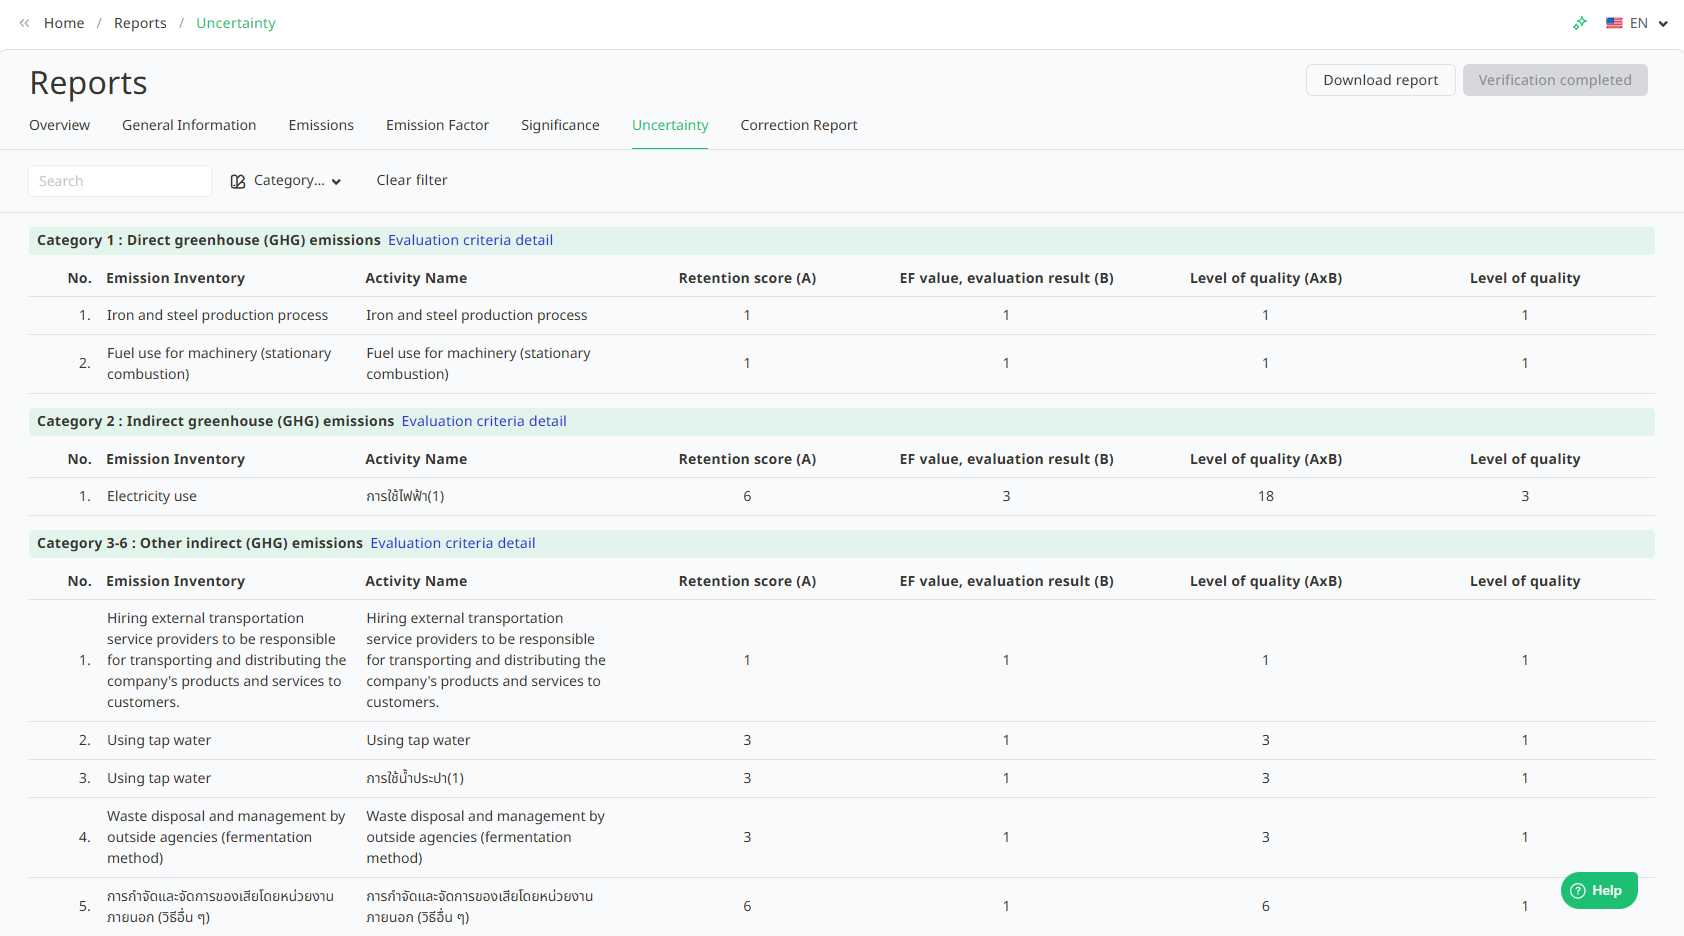
2.6. Uncertainty - Displays the uncertainty assessment score for activity items. The assessment score is derived from the source of evidence for the activity item.
2.7. Correction Report - The system displays a defect correction report for the auditor. The auditor can raise issues that need to be corrected by the organization through the system

How to Add a Defect Report :
2.7.1. Click the New button.

2.7.2. Enter the information or issues that need to be corrected by the organization and select the relevant requirements. The system will change the status to Revising for the verifying organization. If the auditor needs to provide further explanation, they can click the explanation text box to elaborate.
2.7.3. Once the organization has corrected the defect correction report, the status of the defect correction report will change from Revising to Waiting for the verifier.

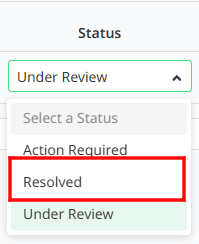
2.7.4. After reviewing and finding that the issue has been resolved, click the downward arrow icon as shown in the image to change the status.

2.7.5. Select the Completed status.
2.7.6. Fill in the auditor's conclusion.

Was this article helpful?
That’s Great!
Thank you for your feedback
Sorry! We couldn't be helpful
Thank you for your feedback
Feedback sent
We appreciate your effort and will try to fix the article